Each instance of MSP Challenge is created using a configuration file that is loaded into the MSP Challenge server manager. The server manager pulls all the requested data from the stipulated GeoServer, sets up the MySQL database for the requested edition and all its data. It also sets up the requested background simulations (e.g. Ecosystem simulation (MEL & EwE), Shipping simulation (SEL), Energy simulation (CEL)), and sets up any other more technical things required to get the MSP Challenge edition up and running. This means that without a configuration file, there is no MSP Challenge edition or session. This configuration file is a text file in the JSON format. See the North Sea, Baltic Sea, Clyde marine region pages for more information on what the default configuration files for these editions look like.
We developed a configuration editor to enable the customisation of the configuration files in a user-friendly manner. The configuration editor is part of the complete installation package available for download. On this page, you can learn how to use this software. We suggest you start by watching the tutorial underneath and refer to the text below for more detailed information.
Note: this following instructions are about using the configuration editor. For more detailed about the actual configuration that editor creates, consult the configuration data schema page and its sub-pages.
MSP Challenge Server Configuration Editor
Downloading and opening an existing configuration file
If you've installed the full MSP Challenge simulation platform, then you also have an application called the MSP Challenge Server Configuration Editor at your disposal. This is a tool we have created to make it easier to edit the configuration files, such as the ones we provide as part of the full platform installation.

If you want to edit an existing configuration file (the North Sea, Baltic Sea or Clyde Marine Region Basic configurations), you'll have to download a copy of this file from the MSP Challenge Server Manager, store it somewhere locally (such as in My Documents), and then open this file in the editor:
- Open your Server Manager through the MSP Challenge Server shortcut on your computer, or by navigating to the URL in a browser (http://localhost/ServerManager)
- Log in with your MSP Challenge account and open the Configurations tab.
- Click on the properties button (i-icon) to the right of your chosen configuration file.
- In the properties window that pops up (see screenshot to the right) click on the Download button to download your configuration file of choice.
Now you can open the MSP Challenge Server Configuration Editor, click on Menu, select Load and select the configuration file from the folder in which you stored it. The Configuration Editor can take a few seconds to load the file you selected.
General application overview
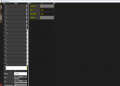
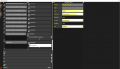
When you open the Configuration Editors, you'll see two tabs on the left side (second image below): "Menu" and "Issues".
The "issues" tab (fourth image below) is useful when saving your file in case there are any incompatibility in the configuration files, they will be listed here.

General navigation in the configuration editor
Once your selected file is open, you can see its structure on the left side (picture below on the right), the main functions in the configuration file are discribed below:

Under this category you can define restrictions - combinations of uses that you want to set as impossible (error) or not advised (warning).
A configuration file with plans saved in it allows you to recreate a session with those plans again. Use this feature to set up a session with so-called starting plans in them.
CEL is the offshore energy simulation. In the config file you can customize the icons shown in the simulation where there are oil and gas fields and wind parks.
SEL is the shipping simulation. Here you can configure the ports and the shipping intensity from each port for different time frames.
This is an acronym for ‘MSP EwE Link’. MEL allows you to specify which data layers (e.g. fish farms) create which kind of pressures (e.g. artificial habitat) that are subsequently fed into the EwE ecosystem simulation running in the background of an MSP Challenge session.
This category contains all the data layers included and their visualization settings.
A configuration file with objectives saved in it allows you to recreate a session with those objectives again. Use this feature to set up a session with specific starting objectives.
- Region:
At the moment it is not advisable to change the region from the config file as this defines the path to the specific folder the layers and models are stored for this session, all the settings for the session would not make sense anymore (think for instance of layer names that change for different regions).
You might have noticed that some categories on the left have a little arrow under the name, if you click on those it will expand the menu below or to the right side of the screen (at some point you might need to scroll to the right to see it all), lets see for instance under "restrictions":

Tips to start customizing your session
Time span of you session
You might want to start by defining the start year and end year, as well as the duration of each era for your session:

Do not forget to save your changes by clicking on the "Menu" tab and "save as".
Objectives
Check the objectives set in the basic file and see if you want to add, change (just type on the field you want to change), or remove any of them. To add an objective you may have to scroll down to the end of the list of objectives to click on the + button.
Delete objectives by clicking the x button under it's number. It will delete imediatelly and is not reversable.

Add objectives by clicking on the + button
Add your objectives details


Do not forget to save your changes by clicking on the "Menu" tab and "save as".
Restrictions
You can also customize the restrictions to your needs. There are 3 types of restrictions: info, warning or error. Each has a different consequence in the game, all involve at least a message under the Issues tab of a plan. Errors hamper players to finalize a plan, warnings are strong messages but players can still finalize a plan, and info messages are purely insightful information messages. Adding, changing and removing restrictions follows the same logic from the objectives, if you want to add a restriction, scroll to the end of the restrictions list and click on the "+" button. Follow the steps to add a new restriction in the image gallery below.

After you clicked on the plus sign to add a new restriction, click on the downside arrow

Click on the + button

Click on the side arrow
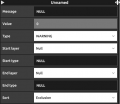
Right click on the "Message" field
Click on "Instantiate" to be able to add text
Type the message you want to display when this restriction is triggered, the type of restriction you want to set, and the 2 layers you want to select to set the restriction.


Do not forget to save your changes by clicking on the "Menu" tab and "save as".
Data layers
You can also customize the data layers present in the platform, removing, adding and changing the way they are visualized in the platform itself.
In the so called basic configuration files we have not included all data layer present in GeoServer, meaning that you could choose to add data layers to your session, for instance, in the Baltic Sea basic configuration file we did not include the areas where fishing cod is not allowed (they are however taken into account in the ecosystem model via MEL), you could opt to make them available for your session.
- Remove
Please note that there will be no confirmation pop-up, the layer will be immediately deleted and this action is not reversable. If you delete a layer by mistake, you will have to add it manually (or don't save your changes when leaving, but you might be loosing a lot of other customizations by doing so).
Removing a layer is simple: just click on the cross under the layer's name (just like highlighted in the objectives' section).
- Add
You can add 2 types of data files in geoserver: raster and vector, by using the "+" button, at the end of the layers section.
- Change/customize
All data layers have by default at least one type; colours, patterns and icons are attributed to each type by default. You can customize them scrolling down to the “layer types” and expanding the type menu. The complete overview of Patterns and Icons for Vector Layers are listed here!
Below we show the important fields to edit for both vector and raster layers.
Vector Layers
When adding a layer in the configuration file, please fill in the information as explained below.

1. Name of the layer as in GeoServer. We use the naming convention "RA_LayerName" for vector layers (RA standing for Region Acronym)
2. Type of layer, for vector layers: point, line, or polygon base
3. Name of the layer as you want it to be shown in the simulation
4. Layer category you want the layer to be in the simulation *
5. Layer sub-category you want the layer to be in the simulation *
6. In this sub-section you can customize the interaction users can have with the layer (mark the green checkbox if the layer contributes to production of green energy, for instance wind parks, this will influence the KPIs).
7. In this sub-section you can set up information about the layer in question.
8. If you add a layer with different types, for instance the layer Military Areas in the North Sea (see image below), you should set this up in your configuration file. Note that this needs to be set up first at your datalayer side: each type you will want to establish needs to have a number atributed from 0 to n, a new column with the name "type" needs to be added to the table of the layer and for each geometry you have to set the corresponding values of the type .
* you can see the existing categories and sub categories of data for each edition in the data sources page.

Do not forget to save your changes by clicking on the "Menu" tab and "save as".
Vector layers Layer Types

1. Each type in your data layer database has an id number starting by 0. If a layer doesn't have types, you will see only the type 0 and that is the one you can set-up
2. If your data layer is polygon based you should tick "show polygons"
3. You can choose the color of your geometry here by clicking on the colour box
4. You can choose a pattern to fill your geometry, the default is 0, which will fill your polygon with solid colour
5. If your layer is based on lines, you should tick that box (instead of the polygon one) and you have the aditional option to use different types of lines. The same logic applies when dealing with point based layers.
The complete overview of Patterns and Icons available for Vector Layers are listed here!
Do not forget to save your changes by clicking on the "Menu" tab and "save as".
Raster Layers
When adding a raster layer you'll have to make essentially the same as for a vector layer with some additional details:

1. We use the naming convention "RA_LayerName_raster" for raster layers (RA standing for Region Acronym). Geotype needs to be set to "raster"
2. The raster size (Width and Height) is set by default, enter the measures of your raster image
3. The "Raster Material" is the name of the shader you will be using to customize the layers' visualization; the "RasterMELCustomizable" shader is one we have created specially for the MSP Challenge. We advise you to use this shader, with it you can use any number of categories and customize the categories and colours to be used see section below under "raster"
4. You can set this value to zero or slightly above if you want to cut some of the lower values of your raster image
5. For layers that are not originated from our simulations you should check this box
Additional note: the "filter mode" (below number three in red) can be set as:
- "point", for raster layers using discrete values (imagine a land cover layer with each number corresponding to a land use), this will take the value of the raster and assign only the colour you assign to it in the types
- "bilinear", this filter mode will average the values of the surrounding cells; use this to smothen the edges of cells in the raster
- ''trilinear", this does almost the same as bilinear filter but has an extra iteration from it.
Do not forget to save your changes by clicking on the "Menu" tab and "save as".
Raster Layer Type
For raster files the main difference is that the types are actually a range of values with equal intervals. The first step is knowing what is the range of values of your raster file, next you have to determine what is meaningfull for the users: is it worth having intervals of 0,1 m/s or 1m/s in a wind speed layer? Intervals need to be equal in the same data layer (not in all layers). This will determine the number of types for a raster layer. See example of the wind speed layer for the North Sea edition:

Note: The value in the type (under approval) must be 0 for the first type and 1000 for the last type (the other values depend on how many types you define, they must be equal intervals).
Do not forget to save your changes by clicking on the "Menu" tab and "save as".
CEL
CEL is the acronym of our energy simulation, here you can see the visuals' definition for items that fall under the production of green energy or grey energy. You can opt for another colour and even icon (but the icons must be implemented in the game, so you can only choose from the ones in the list).
SEL
Under SEL you will find all details used in the shipping simulation:

1. All layers that define shipping routes or defined shipping paths to assist in the path finding in the shipping simulation
2. All layers that are used in the shipping simulation as ports. For instance, besides the known ports, a wind farm is a "port" for maintenance vessels since it needs maintenance operations that can only be accessed by boat, this will create shipping activity from maintenance vessels
3. Shipping intensity expected for that port for different types of vessels. Here you are also allowed to make projections into the future by using the starting time (month)
4. Routes taken into account for the path finding of the shipping model
5. Layers that can impose restrictions to navigation, they can be set per vessel type
Ship types (0 - ferry, 1 - passenger, 2 - tanker, 3 - cargo, 4 - maintenance) and configuration of the outputs from the shipping model are also done in SEL.
MEL

1. Name of the ecosystem model MEL connects to
2. Size of the grid as well as coordinates of its extreme positions. If this is not correctly set-up the output from the ecosystem model will not show properly.

3. Layers from the MSP Challenge that contribute to each pressure layer created and in which proportion. This is also customizable, if, for instance, you have a session focused on the effects of shipping in the ecossystem due to the noise produced, you can customize this pressure to the different values according to vessel types to have a more meaningfull insight on these effects. For the cases where a plan (for example a wind farm) has a construction phase, the pressures that take effect under the construction phase or exploitation phase may differ and you can add the layer twice, ticking the box " When under construction" in one of them to specify the pressure intensity created during this phase. The layer influence in each pressure is set from 0 (minimum) to 1 (maximum)

4. Under fishing you will find the fleets that users can influence in the simulation and the contribution of each country to the global fisheries from that fleet.
5. The outcomes from the ecosystem model to the MSP Challenge are also listed and categorized here. The way they are visualized in the game is actually done under the layers menu. Under our layer naming convention you can find the outcomes of MEL as "mel_[name of output]".
Do not forget to save your changes by clicking on the "Menu" tab and "save as".
Plans
In this section you can find the starting plans defined in the configuration file. Starting plans are important for the shipping and energy models to run with the base scenarios (current situation) at the starting point in the sea basin. It's not advisable to remove any starting plans.
Although you could edit plans in the configuration editor, it's not very straightforward; they are best created or modified, if needed, in the client. Unfortunately, at the momment, we have no user friendly way to save the plans made in the client.
Extra tips
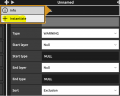
If you find yourself not being able to edit a field, right click on it, you will be presented with 2 extra options: "info" and "instantiate", if you click on the "instantiate" button you will enable editing the text.
If you are not sure about what a field name means or what values should be filled in in a field, you can right click with the mouse and click on "info" to have more information. Note that we are still implementing this feature so it's possible that when you right click on a field nothing shows up yet.
Upload a new configuration file in the server manager
After you are done with customizing the configuration file you need to upload it in the Server Manager and create a new server with the new settings. This process is explained under 'Advanced MSP Challenge Server Manager options' on the 'Setting up your own server page'.
 Co-funded by the European Union.