On this page you will learn how to:
- Set up your own MSP Challenge server sessions after installing the full platform
- Managing your own MSP Challenge server session using the Server Manager application
Setting up a new MSP Challenge server session
To create a new server session - or to put it in other terms - to create a new instance of for example the North Sea, open your Server Manager web application (for more information, see the server installation manual), and from there, here's what you do next:
When you open the Server Manager for the first time, you might be asked to log in first with your MSP Challenge account. Afterwards, you should see this notice. Read it carefully, and click through using the provided link.
You will now see an empty sessions list, which makes sense as this is a fresh installation. Click on the New Session button under the Sessions tab to get started.
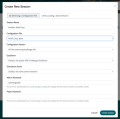
Fill in the form. At least enter a name, select the configuration of choice, and enter an administrator password. When you're ready, click on the Create Session button.
The session creation process should now start. You will get a confirmation message, and a new window in the bottom-right corner will pop up showing the progress. Please be patient.
At some point, the new session's state should change from 'request' to 'setup'. The progress window in the bottom-right corner should indicate that the session creation process finished. The session can now be accessed through the MSP Challenge client.
Are you using your own GeoServer?
If you want to use your own GeoServer installation, then add it before setting up a new server session:
Managing MSP Challenge server session


 Co-funded by the European Union.