Process overview
Updating or adding a data layer in an MSP Challenge Simulation Platform Edition is a two-fold process. On the one hand, the dataset needs to be prepared to integrate the platform; on the other hand, the server needs to know that the new dataset needs to be added to that specific Edition of the MSP Challenge. The so-called “configuration file” has the role of defining which layers, visualisation options, and models are used in each Edition of the MSP Challenge. To update or add a new data layer in an MSP Challenge edition, both the data layer and the configuration file containing that data layer’s definitions are uploaded in a web-tool specially designed for the effect – GeoImport [1].
How to deal with the configuration file is covered in Customise your session. In this section we will cover how to prepare your geo-data to integrate it in the MSP Challenge Simulation Platform.
Formats accepted
The MSP Challenge accepts both vector and raster formats. For vector data, the platform uses shapefiles[2], and for raster data GeoTIFF[3] (Geographic Tagged Image File Format).
To use shapefiles in the platform only the files with extension .shp, .dbf, and .shx are needed. The .TIFF file is enough in case of raster files.
Data preparation
General
Some of the data preparation aspects apply to both vector and raster data and are explained here. For specifics on vector or raster data please refer to the respective sub-sections below.
- Coordinate Reference System and Projection
Always save your geodata files using the coordinate reference system and projection used in the platform: ETRS89 and Lambert Azimuthal Equal Area (EPSG:3035).
- Geographical area coverage
Are you working on an existing edition of the MSP Challenge?
Make sure that the data layer you are adding to the platform only covers the geographical area of the respective edition, check the table below for each edition's detail on the area covered.
Bounding boxes of each existing MSP Challenge Edition (using EPSG:3035)
| MSP Challenge Edition | South | North | West | East |
|---|---|---|---|---|
| North Sea | 2835279 | 4500000 | 2921000 | 4801000 |
| Baltic Sea | 3767500 | 3327500 | 3767500 | 6120600 |
| Clyde Marine Region | 3627000 | 3790000 | 3256000 | 3478000 |
| Adriatic Sea | 1503000 | 2700000 | 4040000 | 5730450 |
Are you creating a new MSP Challenge Edition?
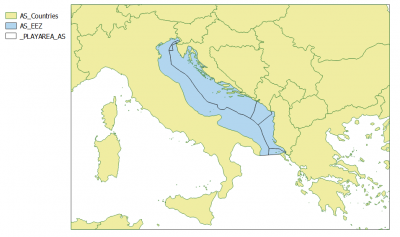
When creating a new MSP Challenge Edition the first step is to define the "play area". The play area is the total geographical area that will be shown in the platform, it works like a bounding box for all the geodata the MSP Challenge Edition will have. This step is crucial for the whole project. Take into account the coutries involved in the project and their respective planning areas at sea, make sure to include them. The play area needs to follow the naming convention: _PLAYAREA_XX, where XX are the first letters of the region corresponding to that Edition. For example, the Adriatic Edition’s play area is “_PLAYAREA_AS”. The figure below shows the countries and planning areas considered when defining the play area for the MSP Challenge Adriatic Edition. In this case, the play area is much bigger than needed for the Adriatic Sea. This is to make it easier to expand the Adriatic Edition in the future to include the Ionian Sea (South of the Adriatic Sea).
Vector
- Geometry
The shapefile itself can’t have invalid geometries; the platform cannot deal with invalid geometries. Remove duplicated geometries. If possible, avoid subtractive polygons as this can originate problems in the platform. Simplify geometries for use in the platform; aim for files (.shp) to have less than 100 KB.
- Categories
If the dataset has categories, for instance, in a data layer about pipelines, we can have different categories, such as “active” or “inactive”. These are mapped in the platform by using “types”. A field named “type” (all low caps) needs to be introduced in the attributes table; this field needs to store integer values from 0 to n; each value will correspond to a type. It is good practice to also add a “type_1” field with the category description. The type’s name(s) and visualisation options are defined in the Edition’s configuration file (see Customise your session). Check if the types in the configuration file correspond to the types used in the new dataset and update if needed.
- Naming convention
Use the following name convention for vector layers: “RR_Layer_Name”, in which RR are the first letters of the region, for instance, AS for the Adriatic Sea.
Raster
- Raster values
In the MSP Challenge, the rasters’ cells values range from 0 (minimum or no data) to 255 (maximum). To make sure a raster file is displayed correctly in the platform, you need to know the minimum and maximum values in the raster file and optimise its visual settings before saving it as a tiff (rendered image). In the saved image, verify if the “no data” or zero values correspond to black and the maximum values to white. In the configuration file, the layers’ types need to be defined to correspond to the interval values that we want to show in the platform (see configuration file).
- Naming convention
Use the following name convention for raster layers: “RR_Layer_Name_raster”, in which RR are the first letters of the region, for instance, AS for the Adriatic Sea.
Upload the data in MSP Challenge's GeoServer
Do not forget to update the configuration file before this step. See how to download the default configuration file and update it at Customise your session (Sections 1, 1.1 and 1.3.4 are the most relevant in this case).
To upload a layer in MSP Challenge's GeoServer use the geoimport tool created by BUas, accessible from mspchallenge.info/geoimport. You do need to log-in with your MSP username and password. If you don't have an account yet, you can create one by clicking on "register" on the top menu.
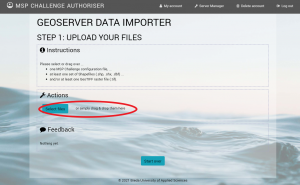
Browse or drag the raster file(s) or shapefile(s) - you need the files with the extensions .shp, .shx and .dbf, and the configuration file in the "actions" box (highlighted in figure below).
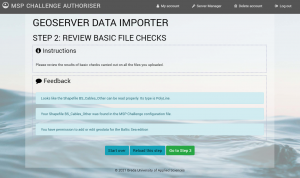
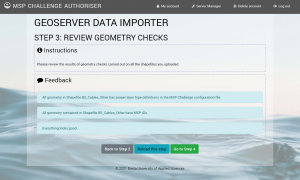
The web tool guides you through the process and makes a series of verifications to make sure the dataset complies with the requirements. For instance, the use of multi-polygons, multi-lines, or multi-points is not supported, geoimport will warn you that it has broken all multi-polygons features into single polygon features. Geoimport will also assign an identification number to each feature (in case of shapefiles); those are needed to track changes in geometries during planning in the platform and for the simulations to run.
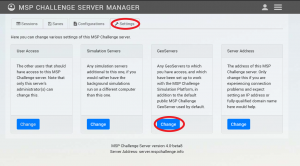
After GeoImport has loaded the layers in the GeoServer, one more step is needed before users can access the changes in the updated Edition of the Platform. The configuration file needs to be added to the server manager and a new server needs to be set up. Section 1.5 of Customise your session guides you through that process.
Upload the data in your own GeoServer
If you prefer to use your own GeoServer to store the geodata layers you should follow all steps mentioned above to prepare your data.
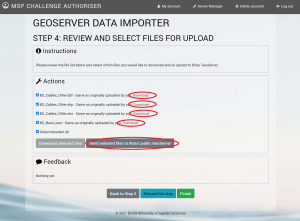
Once the data is prepared you only need to use the geoimport for the vector layers. Geoimport will check automatically if the layer is ready for MSP Challenge usage and will get the right features' identifier. There is one important difference in the geoimport process if you want to use your own server; on "Step 4 - review and select files for upload", do NOT press "Send selected files to BUas' public Geoserver". Download all shapefile's files to your computer and push them to your own geoserver. See highlighted in the image below.
For raster layers you do not need to use geoimport.
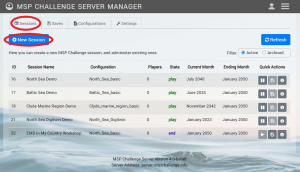
For more details on how to create a session see this page .
[1] https://auth.mspchallenge.info/geoimport
[2] https://doc.arcgis.com/en/arcgis-online/reference/shapefiles.htm
[3] https://www.ogc.org/standards/geotiff
[4] https://epsg.io/3035

 Co-funded by the European Union.