(Created page with "To set up an MSP Challenge Server on Microsoft Azure, here's what you (can) do: # Go to <nowiki>https://portal.azure.com</nowiki> # Log on with your account. If you don't have one, create one. Make sure you have at least a default, pay-as-you-go Azure subscription with a credit card attached to it (see Subscriptions as well as Cost Management & Billing > Payment Methods). # Click on Create a Resource...thumb # Click on Virtual Mac...") |
No edit summary |
||
| Line 20: | Line 20: | ||
# You should now be able to open up an SSH client such as PuTTY, paste the IP address in there, and connect to your server. | # You should now be able to open up an SSH client such as PuTTY, paste the IP address in there, and connect to your server. | ||
# Enter your chosen username and password. If you chose to not set up a password but instead use a public/private key file pair to log in with, then you'll need to select your private key file in the SSH client before you attempt the connection. In PuTTY you do this under Connection > SSH > Auth. | # Enter your chosen username and password. If you chose to not set up a password but instead use a public/private key file pair to log in with, then you'll need to select your private key file in the SSH client before you attempt the connection. In PuTTY you do this under Connection > SSH > Auth. | ||
# Now you are ready to start installing the MSP Challenge Server's Docker containers. For this [[Docker server installation|follow the steps on this page]], starting at the top. '''Note that Docker | # Now you are ready to start installing the MSP Challenge Server's Docker containers. For this [[Docker server installation|follow the steps on this page]], starting at the top. '''Note that not just Docker but also Git will very likely already be installed for you on this image. So you can skip both those steps.''' | ||
Revision as of 08:18, 18 April 2024
To set up an MSP Challenge Server on Microsoft Azure, here's what you (can) do:
- Go to https://portal.azure.com
- Log on with your account. If you don't have one, create one. Make sure you have at least a default, pay-as-you-go Azure subscription with a credit card attached to it (see Subscriptions as well as Cost Management & Billing > Payment Methods).
- Click on Create a Resource...
- Click on Virtual Machine.
- In the form...
- Select your subscription
- We recommend you create a new Resource Group, with a name of your choice
- Give your Virtual Machine a name of your choice
- Select an appropriate regional Azure data centre. A nice overview of where these data centres are physically located can be found here.
- When it comes to security and availability/redundancy settings, we have no recommendations to give, this choices are up to you. Just remember, the more secure and available/reliable you want this virtual machine to be, the higher the price. To be frank, BUas has so far never chosen any infrastructure redundancy or anything beyond standard security levels, simply because when we used MS Azure, the virtual machines would always only be temporary (e.g. online for a week or two).
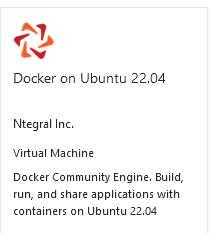
- As to the Operating System image, we recommend choosing Docker on Ubuntu 22.x.
- As to the Size options, we recommend choosing an option from the Standard F-series range. The F-series range is optimized for compute (vCPU), and particularly the services and simulations running on the server can be at times compute-heavy. On the other hand, having a nice big set of working memory (vRAM) at your disposal is also nice. We have recently therefore tended to select Standard F8s v2 sizes (8 vCPUs and 16 GB vRAM). In the end it's you choice.
- Make sure you enable SSH access with a administrator username and password (or just the username accompanied by a private key file you've generated using the key pair file that Azure generates for you).
- All other options are not so important/relevant really, in our opinion. All up to you to figure out and choose. The default values are all fine.
- Finally click on Review & Create, and assuming the validation passes, click on Create.
- It'll take a little while, but soon your virtual machine will be ready.
- When you click on it (e.g. from the MS Azure Home page), you'll see on the right-hand side an overview of the virtual machine's settings that includes its IP address.
- You should now be able to open up an SSH client such as PuTTY, paste the IP address in there, and connect to your server.
- Enter your chosen username and password. If you chose to not set up a password but instead use a public/private key file pair to log in with, then you'll need to select your private key file in the SSH client before you attempt the connection. In PuTTY you do this under Connection > SSH > Auth.
- Now you are ready to start installing the MSP Challenge Server's Docker containers. For this follow the steps on this page, starting at the top. Note that not just Docker but also Git will very likely already be installed for you on this image. So you can skip both those steps.
This page was last edited on 18 April 2024, at 08:18. Content is available under GPLv3 unless otherwise noted.


 Co-funded by the European Union.